


I can’t write a “best hikes in the Japanese Alps” roundup the way the internet often does, by sprinkling superlatives over routes I haven’t personally walked. So this is narrower and, I hope, more useful: these are the Japan Alps trails I have genuinely completed on foot and would actually hike again, plus the hard lessons I took from each. I’m separating easy scenic valley walks from genuine alpine mountaineering, because Kamikochi can be a gentle river stroll while the Northern Alps ridgelines around Tateyama, Tsurugi, Yari, and Hotaka can turn into serious terrain fast. And for anything beyond the valley floor, you should treat conditions as date-sensitive: check trail closures, snow, hut operations, and the latest forecasts immediately before you go, because a route that was “fine last week” can be a bad decision today.
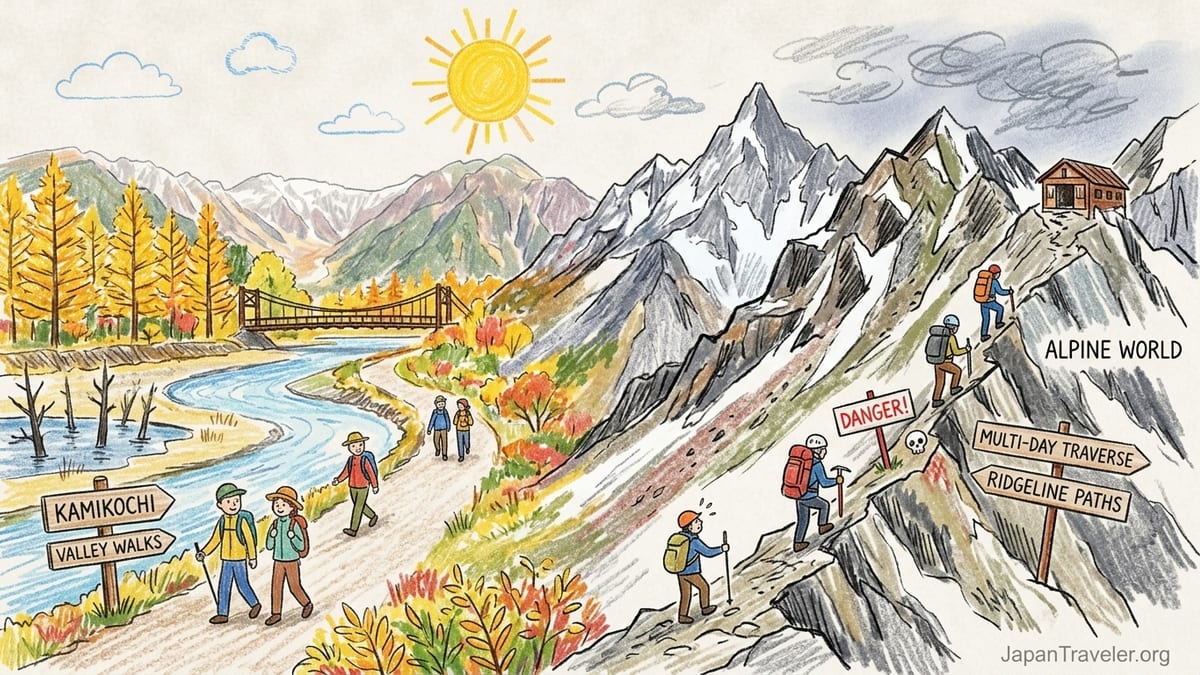
Before You Pick a Trail: The Japan Alps Are Two Different Worlds
If you only ever see Kamikochi on social media, you’d be forgiven for thinking “Japanese Alps hiking” means flat paths, larch trees turning gold, and a picnic by the Azusa River. That exists, and I love it. But the same valley is also a launchpad into terrain where a small weather mistake becomes a rescue call. Even official visitor guidance draws a bright line between straightforward valley walking in Kamikochi and the higher Northern Alps routes described as serious terrain, including exposed sections and multi-day traverses.
One example matters because people underestimate it: the long Tateyama-to-Kamikochi traverse, commonly framed as a bucket-list route. Official tourism guidance describes it as a six to seven day undertaking and explicitly warns that the Daikiretto section is genuinely dangerous. If you have not already done exposed ridge travel in stable conditions, this is not where you “see how it goes.” It’s where you go prepared, or you don’t go.
Even for the hikes I describe below, what made them repeatable for me was not bravado, it was systems: I carried the same core safety kit every time, I started earlier than I thought I needed to, and I turned around without negotiating with myself when the mountain started sending clear signals. I will say “I turned around” where that happened, because the most honest trail report includes the day you didn’t finish.
One more practical note before we get specific. Kamikochi is seasonal, and transport is time-sensitive. In 2026, the official season runs from April 17 to November 15, with a closing ceremony on November 15. Buses can stop earlier than you think in the afternoon. If you plan a summit day or a long out-and-back, build your itinerary around the actual last departure for your date, not a generic schedule you found in an old blog post.
Easy Scenic Walks (No Mountaineering): Kamikochi’s Valley Classics
Trail 1: Taisho Pond to Kappabashi (Kamikochi’s “greatest hits” walk)
Start point: Taisho Pond bus stop
End point: Kappabashi area (Kamikochi Bus Terminal nearby)
Distance/time actually walked: roughly 1.5 to 2.5 hours at a slow, photo-heavy pace
Elevation gain: minimal and not meaningful for planning
Weather I had: clear, cold morning that warmed slightly by late morning (valley inversions are real here)
Surface: wide packed gravel and maintained riverside path, generally easy footing
Chains/ladders: none
Exposure: none in the mountaineering sense; it is a valley path
Hut use: none required; cafés and rest areas exist near Kappabashi
Water availability: I carried my own; you can refill at facilities when they are operating in-season
Fitness required: basic walking fitness; suitable for most travelers who can walk a few miles
Why I’d hike it again: the payoff-to-effort ratio is absurdly good. You get the dead-tree silhouettes at Taisho Pond with the Hotaka range behind, and then you move through classic Kamikochi river scenery without having to commit to an “alpine day.” It’s also the walk I repeat when weather up high looks sketchy. If the ridges are socked in, this still delivers.
Exactly what I carried: 20–25L daypack, 1.0–1.5L water, light insulating layer, rain jacket, cap, thin gloves in shoulder season, sunglasses, sunscreen, small first-aid kit (blister care), headlamp, phone with offline map, and cash for snacks and bus fare. Footwear was regular hiking shoes, not boots, because the surface is smooth and predictable.
Trail 2: Kappabashi to Myojin Bridge and Myojin Pond area (out-and-back)
Start/end point: Kappabashi area (out-and-back to the Myojin area)
Time actually walked: about 3.5 to 5 hours total depending on stops
Elevation gain: gentle and not a route-defining factor
Weather I had: mixed sun and cloud, occasional drizzle that never became “rain gear all day”
Surface: maintained walking path, sections of compact dirt and gravel, occasional roots
Chains/ladders: none
Exposure: none
Hut use: not required, but you pass staffed areas during the season
Water availability: I relied on my bottles; refills depend on what is open that day
Fitness required: moderate walking endurance; still not “mountain fitness”
This is the Kamikochi walk that feels like you actually went somewhere. It’s longer than the Taisho-to-Kappabashi stroll, but still forgiving if you pace yourself. What surprised me the first time was how quickly crowds thin once you leave the Kappabashi cluster. I’d hike it again for the quiet, not for a summit.
Exactly what I carried: same kit as above, plus a slightly larger snack load (on my repeat walks I bring two convenience-store onigiri, a small bag of trail mix, and electrolyte tablets). I did not carry trekking poles on these valley walks, though some people like them for joint comfort.
“Looks Easy From the Valley” But Isn’t: Mt. Yakedake (Day Hike That Can Turn Alpine)
Trail 3: Mt. Yakedake day hike (attempt from the Kamikochi side; turned around)
Start point: Kamikochi area trail access (approach from within the valley)
End point: turned around below the upper volcanic zone and returned the same way
Time actually walked: about 4 to 6 hours total, including a long weather wait and a conservative turnaround
Elevation gain: substantial for a day hike; I did not have a reliable “official” number on my attempt and will not guess it
Weather I had: wind increased steadily; cloud thickened; visibility deteriorated enough that my pace slowed and route confidence dropped
Surface: forest trail low down, then steeper sections with looser footing as you gain height
Chains/ladders: none encountered on my attempt, but the route demands hands-on balance in places when wet
Exposure: moderate risk increases with poor visibility because the terrain steepens and the route feels more committing higher up
Hut use: none used; this was a day attempt with a hard turnaround time
Water availability: I carried 2.0L and used most of it; I did not rely on streams for treatment because I wanted speed and simplicity
Fitness required: strong uphill fitness plus the discipline to stop early if conditions degrade
I’m including a hike I didn’t complete because it’s the most important kind of information: the route that looks day-hike friendly on paper but punishes you for treating it like a casual add-on to a Kamikochi stroll. Yakedake is often described as doable as a day trip, and it can be, but “day trip” does not mean “easy.” The mental load changes when the weather shifts: your margin is your turnaround time, your legs, and whether you planned the last bus like a deadline rather than a suggestion.
Why I’d try it again: I turned around because wind and cloud were stacking up and I couldn’t justify continuing without a clean visibility window. That’s exactly why I’d go back. On a stable day, it’s a rare thing: a volcano summit in the same trip as a Kamikochi river walk. Next time, I’d start earlier, commit to a stricter weather gate, and I’d plan to stay overnight in the valley so I’m not making safety decisions under bus-schedule pressure.
Exactly what I carried: 25L pack, 2.0L water, rain jacket and rain pants, warm midlayer, thin gloves, beanie, headlamp, small emergency bivy/survival sheet, first-aid kit, trekking poles (I did use them), high-calorie snacks, phone with offline map, and a compact power bank. Footwear was proper hiking boots for ankle support and wet traction.
The Repeat-Worthy Alpine “Gateway”: Kamikochi to Tokusawa and Yokoo (Long Day Walk or Light Overnighter)
Trail 4: Kamikochi to Tokusawa (and/or Yokoo) valley approach walk
Start point: Kamikochi Bus Terminal/Kappabashi area
End point: Tokusawa or Yokoo (I’ve walked to Tokusawa as a day out-and-back; I’ve also used this corridor as an approach for bigger objectives)
Time actually walked: 5 to 8 hours depending on turnaround point and breaks
Elevation gain: gradual; still a valley walk, but the distance makes it feel “real”
Weather I had: bright autumn sun one trip; light rain another; both were manageable because the terrain is non-technical
Surface: maintained trail, packed dirt and gravel, some roots, occasional muddy patches after rain
Chains/ladders: none
Exposure: none
Hut use: on day trips I didn’t use huts for sleeping; on other itineraries I’ve used valley lodges as staging points (availability is seasonal)
Water availability: I carried 1.5–2.0L; in-season you can often buy drinks at staffed facilities, but I never plan hydration around that
Fitness required: endurance walking fitness; not mountaineering fitness
This is the hike I recommend to friends who say, “I want to feel like I hiked in the Alps,” but who don’t want exposure, ladders, or a knife-edge ridge. The scenery builds slowly: you begin with crowds, then settle into a rhythm as the valley widens and the sound of the river becomes your metronome. It’s also a surprisingly honest fitness test. A flat-looking trail can still cook you if you aren’t used to sustained hours on your feet.
What I underestimated the first time: time. I assumed I’d move at my city walking pace. I didn’t. Photo stops, snack breaks, and just the pleasant drag of the valley meant I needed more buffer. If you’re day-tripping, your real crux is not steepness, it’s the afternoon transport cutoff out of the park.
Exactly what I carried: 20–25L pack, 1.5–2.0L water, rain jacket, light insulating layer, small towel, blister kit, headlamp, compact sit pad, snacks for a full day, and cash. Footwear was hiking shoes; trekking poles were optional but helpful when tired.
Genuine Alpine Mountaineering: What I Have Done, and What I Refuse to Call “Easy”
Here’s the boundary I won’t blur: I have walked in the Northern Alps, but I will not claim to have completed the headline multi-day ridgeline routes around Yari and Hotaka in the way serious climbers mean it. I also will not tell you “it’s fine” because a route is popular. Official guidance specifically flags ridgelines like the Daikiretto between Mt. Oku-Hotakadake and Mt. Yari as dangerous even in good weather, with fatalities reported every year from falls on these courses. That is the opposite of a casual recommendation.
What I have done, honestly, is the kind of “gateway mountaineering” that many hikers graduate to after Kamikochi valley days: steep, sustained ascents where weather and timing matter, where the trail can demand hands, and where retreat is part of the plan. On one such attempt (Yakedake), I turned around. That was not failure; it was correct execution of a safety decision. If you want a writer to pretend every summit happens on schedule, this is not that article.
If you are drawn to Tateyama, Tsurugi, Yari, or Hotaka, treat those names as categories, not single hikes. There are beginner-friendly sightseeing options on the Tateyama Kurobe Alpine Route corridor, and there are mountaineering lines that require helmet-level risk management. The same area can be sunny at Murodo and icy on a north-facing slope an hour away. The month matters, the hour matters, and your ability to move safely on rock matters.
Hut reality, in plain language: many mountain lodges in the Northern Alps operate seasonally and some close around mid-October, while shoulder season can bring winter-like conditions. For example, one major hut group serving the Yari corridor lists an operating period that ends on October 11. If your plan assumes huts are open “because it’s still autumn,” that assumption can collapse your itinerary. Always confirm the hut’s operating period and reservation rules for your exact dates.
Conditions, Closures, and Timing: What I Check Now (Because I Got Burned Before)
The most repeatable hiking days I’ve had in the Japanese Alps weren’t about perfect fitness. They were about boring pre-checks I used to skip. Kamikochi access can be disrupted by heavy rainfall events, and official updates have documented temporary blocks and reopenings in recent seasons. That matters because a “simple valley stroll” still depends on a road and bus system. If the valley access is interrupted, your hike doesn’t start.
Season dates and last transport are not trivia. In 2026, Kamikochi’s season is officially framed from April 17 to November 15, and local operators stress that last departures and seasonal schedule changes can strand hikers who assume summer timetables apply year-round. On the Takayama side, the bus timetable shows service windows and conditional operations that change by date, not just by month. In other words: check your exact day.
For Tateyama access, I also check the Alpine Route’s operating period and daily operating status before I commit to lodging. The route publicly lists its 2026 operating window as April 15 through November 30, and it posts day-by-day status and weather snapshots. That doesn’t guarantee the trail you want is safe, but it does anchor your transport plan in reality.
My personal “non-negotiable” last check list, done the evening before and again the morning of: (1) official valley access status, (2) updated bus schedule for that exact date, (3) hut operation status if I’m going beyond day-hike range, (4) wind and precipitation forecast for the elevation I’ll be at, not the town forecast, and (5) daylight hours for the month, because late starts in October can turn into headlamp descents even on non-technical ground.
The Takeaway
The Japanese Alps reward honesty. If you want a guaranteed, low-risk day, Kamikochi’s valley walks from Taisho Pond through Kappabashi and out toward Myojin are the trails I happily repeat, with minimal technical demands and maximum scenery. If you want a “real hike” without mountaineering exposure, the longer valley approach walks toward Tokusawa and Yokoo deliver big-alps atmosphere while keeping the objective hazard low.
But if you’re tempted by names like Yari and Hotaka, treat that as a different sport. Official guidance does not mince words about the seriousness of certain Northern Alps ridges and traverses, including truly dangerous sections like the Daikiretto and multi-day routes that demand stable conditions, solid technique, and conservative judgment. The most responsible hiking story I can tell from my own boots is this: I turned around when conditions degraded, and I’d rather write that sentence than write an accident report.
Finally, do not publish your plan in ink until you re-check conditions immediately before you go. Hut dates, trail closures, early snow, rainfall disruptions, and transport changes are not rare in these mountains. They are normal. Build your itinerary so that adapting is part of the design, not an emergency improvisation.
FAQ
Q1. Is Kamikochi hiking “easy” just because it’s popular?
No. Popularity mostly reflects access and scenery. The valley walks are straightforward, but time, weather, and seasonal transport cutoffs still matter.
Q2. What’s the best easy scenic walk in Kamikochi if I only have half a day?
Taisho Pond to Kappabashi is my repeat pick because it’s low-effort, high-scenery, and easy to shorten if schedules change.
Q3. Can I hike from Kappabashi to Myojin and back without special gear?
Usually yes in-season: hiking shoes, rain protection, and enough water are the core needs. I still carry a headlamp and blister care.
Q4. Is Mt. Yakedake a safe day hike from Kamikochi?
It can be done as a day hike, but it’s not automatically safe. Weather and visibility can deteriorate quickly, and you must plan around strict turnaround times.
Q5. What’s a good “step up” from short Kamikochi walks without doing exposed ridges?
The longer valley approach hikes toward Tokusawa or Yokoo are a solid step up because they test endurance without technical exposure.
Q6. Are the Tateyama, Yari, and Hotaka areas appropriate for beginners?
Some sightseeing and easier trails exist, but many routes in those areas are serious alpine terrain. Do not assume suitability based on fame or photos.
Q7. Why do people warn so strongly about the Daikiretto section?
Because official guidance describes it as genuinely dangerous, and it is part of longer, committing traverses where a fall can be fatal.
Q8. Do mountain huts stay open through October in the Northern Alps?
Not always. Many huts are seasonal and some close around mid-October. Confirm each hut’s operating period for your exact dates before committing.
Q9. What equipment do you consider non-negotiable even for “easy” Kamikochi walks?
Rain jacket, extra layer, water, snacks, a headlamp, blister care, offline maps, and cash. Easy terrain does not eliminate basic preparedness.
Q10. What’s the single biggest mistake you made on these hikes?
Underestimating how fast conditions and timing constraints change in the Alps. Now I build buffer time and I turn around earlier.